Sewing Machine Maintenance: The Complete Guide to Cleaning, Oiling & Care
Is your sewing machine making a weird clunking noise, skipping stitches, or building up a suspicious amount of lint under the needle plate? You’re not alone — and the fix is almost always simpler than you think. This guide walks you through everything you need to know about sewing machine maintenance: what to clean, when to oil, and how to spot trouble before it turns into an expensive repair bill.
I’ve broken it down into a simple daily, weekly, monthly, and yearly rhythm, so you never have to guess what your machine needs or when. Follow along with step-by-step instructions and photos, and you’ll be able to diagnose those “mystery noises” and keep your machine running like new — all without a trip to the repair shop.
Quick Start: The 5-Minute Sewing Machine Reset
By adopting a ‘reset’ routine now you will be able to extend sewing machine life to the max. You’re also treating your machine to the necessary care that will save you hundreds in professional repair fees down the road.
In case you don’t want to scroll to find your preventative sewing machine care steps, just click on the quick-start link below:
- Daily Care
- Weekly Machine Love
- Monthly Maintenance
- Annual Professional Maintenance
- FAQ & Troubleshooting
The Pro Toolkit: DIY Sewing Machine Service Essentials
You don’t need a lot of tools for DIY sewing machine service, but having the right ones makes a huge difference. I have linked to some different options depending on what you would prefer. Read through the steps to find the right combination for you.
Must-Have General Cleaning Tools

The tools that I use are:
- a soft cloth
- a small brush with stiff bristles (the kind that probably came with your machine)
- a small screwdriver for removing the needle and stitch plate screws (if any)
- clear sewing machine oil
Why a Mini-Vacuum is Better Than Compressed Air

I used to use canned air to dust my sewing machines, and while that may be okay for mechanical machines, it is not recommended for electronic sewing machines. There are differing expert opinions, but I have switched to using a USB mini vacuum and feel so much better about it!
The exact mini vacuum I use is no longer available on Amazon, but any mini vacuum that is small enough to keep in a drawer right by your machine is great. If you go the vacuum route, you will need something small enough to get into the crevices under the stitch plate, and it doesn’t have to be super powerful.
Daily Habits: Preventative Sewing Machine Care Every 8 Hours
Safety First: Power DOWN BEFORE MAINTENANCE

Turn off and unplug your machine before every maintenance step — whether you’re swapping a needle, adding a drop of oil, or just brushing out lint. It takes two seconds and prevents accidental injuries or damage to your machine.
The Golden Rule: When to Change Your Sewing Machine Needle
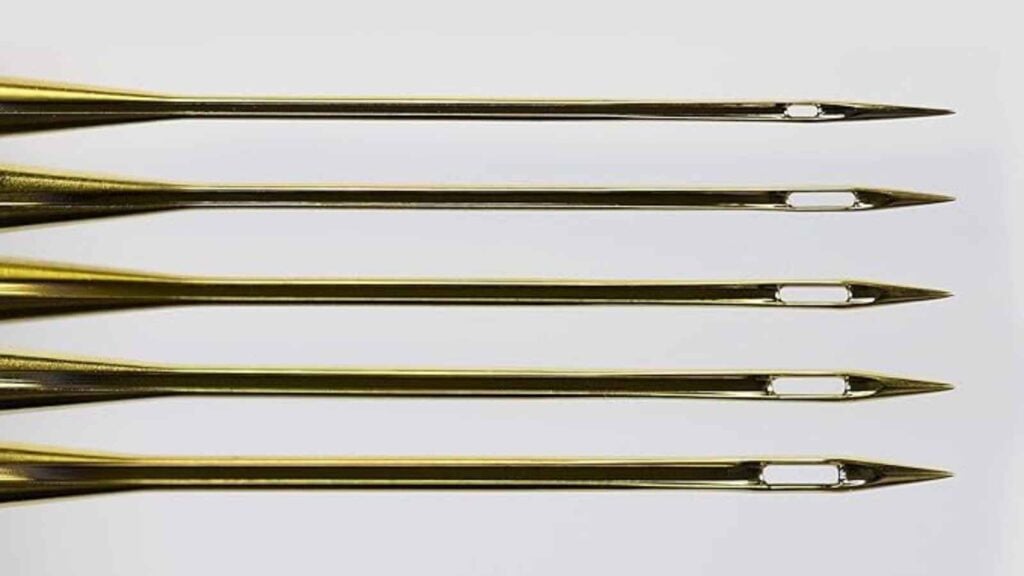
Did you know that you are supposed to replace your needle after eight hours of sewing? Believe it or not, that dull needle (yes, it’s dull now) will cause skipped stitches and uneven seams. And even though it’s nice to skip steps, you’ll be glad if you don’t skip this one!
Remove Lint from the Bobbin Case and Feed Dogs
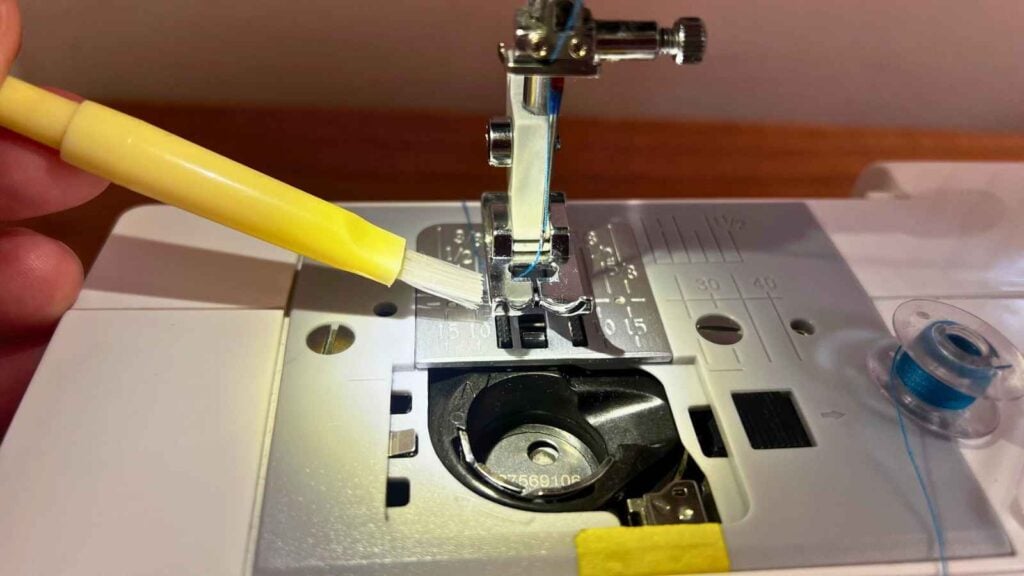
Remove your bobbin thread and brush out the casing. Run a brush and vacuum over the feed dogs. Use your vacuum and do a quick sweep of the area you can see.
Pay attention when you brush the feed dogs—there is more lint there than meets the eye! That’s why I recommend following up with a mini-vacuum to catch what the brush loosens and leaves behind.
The Weekly Deep Clean: Removing Thread Gunk and Tension Grime
Step 1: Remove the Needle, Presser Foot, and Stitch Plate

Remove the needle first. There is a screw that holds it into place on the shaft. Pull it straight down and then angle it out.
Remove the presser foot next. Remove the presser foot at the shaft (indicated in the photo above) to give you the most clearance.
Remove the stitch plate. Some plates pop off with the push of a button, but most require removing a screw or two. You can clearly see the screws so no need to go hunting. Put the screws in a safe place where they won’t get knocked down accidentally.
Step 2: Clean the Bobbin Case

Pro Tip
If you’re not confident yet, take a photo or video of how your bobbin case goes in so you can replace it properly.
Remove the bobbin case from the machine. Side loading bobbin cases are usually held in with two plastic knobs while drop in bobbin cases can just be carefully lifted out.
Remove the bobbin and give the case a good dusting. There are a fair amount of nooks and crannies for dust and lint to build up. Make-up brushes pick up the fine dust very well.
Step 3: Clean the Tension Discs (And Why the Presser Foot Position Matters)
Run a clean length of cotton thread through your tension discs with the presser foot up to dislodge microscopic lint.
How it Works (and Why it’s a “Thing”)

- The “Gap”: When your presser foot is up, the tension discs are open. When the foot is down, the discs clamp together to grip the thread.
- The Trap: Even a little lint stuck in there can act like a “doorstop,” preventing the discs from closing fully when you sew. This causes tension issues leading to those massive thread loops (birdnesting) on the bottom of your fabric.
- The Floss: By “flossing” with a clean piece of thread while the foot is up (in the direction of the thread path), you can catch that debris and pull it out.
Note
Use a clean, high-quality cotton thread. Never use actual dental floss (which is waxed and will gunk up the works) or metallic threads.
Monthly Service: How to Oil and Inspect Your Machine Like a Pro
Step 1: Feel for Burrs and Rough Spots
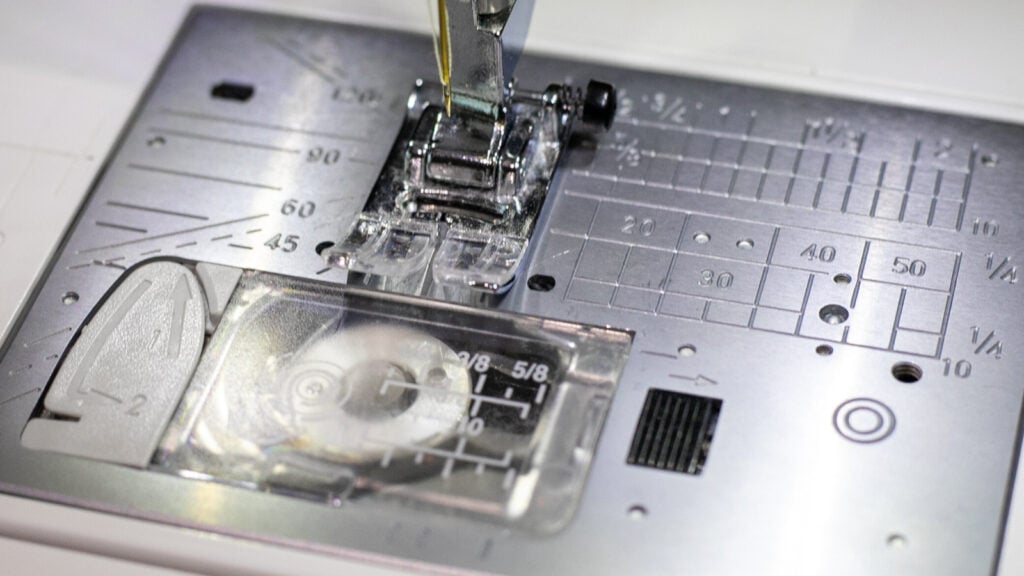
Check for burrs. Run a fingernail over the needle hole in your stitch plate. If you feel a nick, smooth it with a fine emery board to prevent thread shredding.
Step 2: Remove the Spool of Thread

Pro Tip
Don’t pull the thread out from the top when changing or removing a spool of thread. Remove the thread by pulling it out the same direction that it goes through the machine.
To keep the delicate thread path working correctly, I cut the thread near the spool then grab the thread in front of the needle and pull it out from the bottom.
Repeatedly pulling the thread out backward from the spool can cause lint to build up or damage the springs or upper tension disks. I have been doing this for years, and I always recommend it to new sewists.
Step 3: Complete Steps 1 & 2 from the Weekly Clean-Up Section

If you’re cleaning weekly you know what to do. If you’re new or rusty to the process see the Weekly Clean-Up steps above.
Step 4: Clean Out the Lint and Loose Threads

Start with the mini vacuum and go after all the lint and dust bunnies under the stitch plate and bobbin case. You’ll know the situation is dire when the buildup is so bad it looks like felt!
Step 5: Use Bristle Brush for Hard-to-Reach Places

The mini-vacuum cannot reach all the tight spots. Use a stiff bristle brush to reach everywhere. Run the brush though every open nook just to be sure you get as much as possible.
Vacuum one more time after loosening the extra dust.
Pro Tip
It’s okay to really get down in there with the brush. While sewing machines are fine tuned, you won’t break anything by using a long brush to reach the lint.
Step 6: To Oil or Not to Oil? (Check Your Manual First!)

Not every machine needs oil, and some machines need oil more often. Check your sewing machine’s owner’s manual to see if you need to oil it. If so, it will show you the right spots.
Several electronic sewing machines do not require oil.
If you do oil, keep a scrap of fabric handy to blot any excess oil before it drips onto your project fabric
Step 7: Reassemble

Replace the bobbin case. There is only one way that it fits properly in your machine. Use the photo you took earlier if you need a bit of help.
Replace the stitch plate. It should sit perfectly and not move. If you pushed the feed dogs down (the spiky bits that feed the fabric as you sew) reset them.
Replace the presser foot and remember to install a new needle. Before returning to your project, sew a few stitches on a scrap of fabric to confirm everything’s running smoothly and there’s no leftover oil. Then you’re good to go!
Step 8: Dust Your Machine

After removing the thread, give your sewing machine a good dusting with the soft cloth. You could dampen the cloth with mild cleaner, but I usually don’t find that necessary. Ahhh. Doesn’t that just feel good?
Annual Professional Tune-Ups: Why Your Machine Needs an Expert Once a Year

Even with a dedicated cleaning routine, I still make it a priority to take my machine to a certified technician for a professional tune-up once a year.
Think of it as an investment in your creativity; professionals can reach the internal gears and timing mechanisms that we just can’t get to at home. Regular professional care ensures that tiny issues don’t turn into expensive breakdowns, keeping your machine running like new for years to come.
Troubleshooting & Frequently Asked Questions:
How often should I Actually clean my machine?

For the average sewist, a quick clean (brushing out the bobbin area) should happen every 8 to 10 hours of sewing time or after every large project. If you are working with high-lint fabrics like flannel, fleece, or terry cloth, you should clean the feed dogs every time you change your bobbin.
Take a look at the lint buildup in the photo above—this is just a few days’ worth of lint and fuzz from regular use in my studio. Left unchecked, this lint would migrate under the bobbin case, leading to tension failures and messed up timing (like the dreaded 1010 maindrive sync error).
Visible lint and fuzz are the silent killers of sewing machine precision. While this is my normal amount for a few days of use, allowing it to accumulate for a month is a recipe for ‘birdnesting’, eyelashes, and skipped stitches. I don’t have time for that, and I know you don’t either.
Can I use canned air to remove lint and dust?
No! But this is a controversial topic that requires clarification to understand. Compressed air itself doesn’t seem to be a problem, but canned air doesn’t use the air we breathe. Instead it uses a liquid propellant that turns into a gas as it’s released. This is the biggest problem. I used canned air on a mirror once and it permanently damaged the reflective quality behind the glass. Since I don’t have an air compressor, I only use my vacuum to clean my machines.
Here are two videos that demonstrate my experiences.
- Compressed Air Vs. Vacuum (a video demonstration using an air compressor)
- Vacuum Vs. Canned Air (the propellant will damage the metal parts over time).
Does my modern computerized machine need oiling?
Not all modern sewing machines require manual oiling; in fact, oiling a self-lubricating computerized machine can cause mechanical failure. Many high-end modern machines are “self-lubricating” with nylon gears and should not be oiled by the user. Always check your manual first. If your machine does require oil, only use clear sewing machine oil—never WD-40 or household oils, which will gum up the precision parts.
Why is my machine “birdnesting” even after I’ve cleaned it?
Thread tension, needle quality, and incorrect threading are the main causes of “birdnesting”. If the bobbin area is clean and you’re still getting thread loops, it’s usually one of those three things. Here’s what to check.
- The thread: It may not be seated properly in the tension discs. Take the thread out and rethread your machine. Always thread with the presser foot up!
- Your needle: Is it the wrong type of needle for the fabric you’re using, or have you been sewing with it for more than 8 hours? If yes, change it.
- Your thread tails: Holding your ‘thread tails’ every time you start can prevent the little ‘bird’s nest’ on the bottom
- The bobbin: Check to make sure that your bobbin is sitting the right direction in the case. If the bobbin spins the wrong way, the thread often misses the “tension spring” (that little metal flap on the case). Without tension, the thread just heaps up under the fabric.
Why is my machine skipping stitches?
Skipped stitches almost always come down to one of four things: needle problems, incorrect threading, the wrong needle-thread-fabric match, or tension issues. Here’s how to work through them in order, since needle problems cause the vast majority of skipping.
- The needle: This is the first thing to check, every time. A dull, bent, or slightly damaged needle will skip stitches even if you can’t see anything wrong with it just by looking. Swap in a fresh needle before you troubleshoot anything else. It solves the problem more often than you’d expect.
- Needle insertion: Make sure your needle is inserted all the way up into the clamp and facing the correct direction (the flat side usually faces the back). A needle that’s even slightly loose or turned the wrong way won’t sync properly with the hook, and you’ll get skipped stitches even with a brand-new needle.
- Needle-to-fabric mismatch: A universal needle on a stretchy knit, or a lightweight needle on heavy denim or several layers of quilt batting, will skip. Match your needle to your fabric — ballpoint for knits, sharp for wovens, and a heavier needle (90/14 or 100/16) for thick projects.
- Threading: Re-thread your machine from scratch with the presser foot up. A thread that’s popped out of a guide, or wasn’t seated in the tension discs properly, is a common invisible cause of skipping.
- Thread quality: Cheap, low-quality thread sheds fibers and breaks tension consistency as it feeds, which can cause intermittent skipped stitches. If you’ve ruled out the needle and threading and it’s still happening, try switching to a higher-quality thread like Gutermann or Aurifil and see if the problem disappears.
- Tension: If your top thread is pulled too tight, it can prevent the loop from forming properly at the hook, causing a skip. Check that your tension is in the normal range for your machine (usually 3–6) and hasn’t been bumped.
Quick tip: if the skipping happens only on a specific fabric or only with a specific stitch, that’s a strong clue it’s a needle-fabric mismatch rather than a machine problem — swap the needle before you assume anything’s actually wrong with your machine.
Why is my machine making a loud clunking noise as I sew?
Here is the breakdown of why your machine is “marching” instead of “singing,” and how to fix it:
Quick Troubleshooting Trick
Here is my favorite test: Remove the needle and the bobbin, then ‘sew’ as usual. If the rhythmic clunking stops, the issue was your needle or bobbin. If the clunking continues even with no needle in the machine, it’s likely an internal gear or timing issue that needs a professional’s touch. It’s the fastest way to know if you can fix it yourself or if it’s time to visit the shop!
 Why is my machine thumping? (Needle-to-Fabric Mismatch)
If the noise happens right as the needle enters the fabric, the needle is likely struggling to pierce the material.
- The Cause: You are using a needle that is too dull, too small, or the wrong type (e.g., using a Universal needle on heavy denim or 4 layers of quilt batting).
- The Fix: Change to a fresh needle, and ensure it’s a 90/14 or 100/16 for thicker projects. If you hear a “pop-pop-pop” sound, that needle is definitely blunt. Make sure that you are using the correct needle for your fabric – sharp for woven and ballpoint for stretchy knit, or specialty Leather, Jeans or Topstitching needles.
Why is the bobbin bouncing and rattling when I sew?
If the noise in your machine is rhythmic but sounds or “rattly,” the bobbin might be dancing in the case.
- The Cause: You might be using a Generic Bobbin that is a fraction of a millimeter too short for your machine. Even if it “fits,” it will bounce up and down with every stitch, creating a rhythmic clunk.
- The Fix: Compare your bobbin to an original one that came with the machine. In 2026, many machines (especially Janome and Bernina) are incredibly sensitive to bobbin height.
- Another Cause: If you have a front loading bobbin (instead of a drop in) your bobbin tension might be too loose. This happened to my friend with her basic Singer model machine.
- The Fix: Remove the bobbin case and keep the bobbin thread inside. Hold onto the thread and let go of the bobbin case. If the case falls quickly to the table or floor, slightly tighten the screw on your bobbin case. The tension should be just tight enough that the bobbin doesn’t fall from just holding the thread. *Don’t overtighten!
- Another Cause: The thread may not be seated in the bobbin case properly.
- The Fix: Remove the bobbin and rethread it.
What is causing the “grinding rhythm”?
A dry machine doesn’t just squeak—it can develop a heavy, rhythmic “knocking” as the metal gears struggle to glide.
- The Cause: Friction. If the clunking is constant even when you aren’t sewing through fabric (try turning the handwheel slowly by hand), your internal gears need lubrication.
- The Fix: If your manual allows, add one drop of sewing machine oil to the “wick” or the center of the bobbin hook. If you have a “self-lubricating” machine, this rhythmic knocking is a signal that it’s time for a professional service. Every machine is different. My Juki is a thirsty girl.
Dealing with “Compressed Lint Cakes” and Timing Issues
Sometimes lint gets packed so hard under the feed dogs that it turns into a wool pressing mat! We don’t love that.
- The Cause: As the feed dogs try to move up and down, they hit this “cake” of compressed lint, causing a rhythmic thud against the needle plate.
- The Fix: Take off the needle plate and use a wooden toothpick or a heavy-duty brush to scrape between the metal “teeth” of the feed dogs. Sometimes a brush isn’t enough; you really have to dig it out! Try these purpose-built sewing machine cleaning tools.
- Another Cause: low-quality thread uses short staple fibers that can be left behind as lint.
- The Fix: Use high-quality threads like Gutermann, Mettler, or Aurifil exclusively.
The “Timing” Warning (The Heavy Knock)
If the clunking sounds deep and metallic, the needle might be ever-so-slightly grazing the bobbin case.
- The Cause: Your machine’s “timing” is slightly off. The needle and the hook aren’t meeting at the exact right micro-second.
- The Fix: This is the only one you can’t fix at home. If you’ve changed the needle and cleaned the lint and it still knocks rhythmically, stop sewing. Continuing can cause the needle to eventually strike the metal hook and break something expensive.
These steps will solve 95% of your sewing machine problems (unless your machine is really broken).
More from SewCanShe

The 7 Best Sewing Machines for a Beginner

Sewing for Free: 46 Quick Fat Quarter Projects for Gifts and Home

Easiest Plus Quilt Pattern: Free Scrappy Quilt Pattern

The post Sewing Machine Maintenance: The Complete Guide to Cleaning, Oiling & Care appeared first on SewCanShe Free Sewing Patterns for Beginners.